Achieve A Flawless Ceiling Finish: Expert Tips For A Clean, Professional Look

The whole appearance of a room may be much changed by a newly painted ceiling, therefore improving its impression of spaciousness, brightness, and cleanliness. It produces a polished background that enhances the whole ambiance and helps places to seem more friendly and orderly. A well-kept ceiling not only accentuates the décor but also captures the attention to the general maintenance of the house. Depending on the intended impact, the proper color may make a space seem airier and more spacious or comfortable and personal.
This page is to provide basic guidelines for polishing, professional-finish painting ceilings. These instructions will enable people to effectively complete their ceiling painting jobs from choosing the correct equipment and procedures to knowing the greatest color possibilities. Following these ideas will assist you produce a high-quality product that accentuates the attractiveness of any area, regardless of the desired sleek, contemporary design or traditional, timeless vibe.
Choosing the Right Tools and Paint
Choosing premium flat or matte ceiling paint is crucial when deciding which equipment and paint to use for ceiling tasks. Excellent selections include brands like Sherwin- Williams’ SuperPaint and Benjamin Moore’s Regal Select as they so minimise glare and flaws, thus offering a beautiful finish. Excellent coverage and durability of both choices guarantee a long-lasting look.
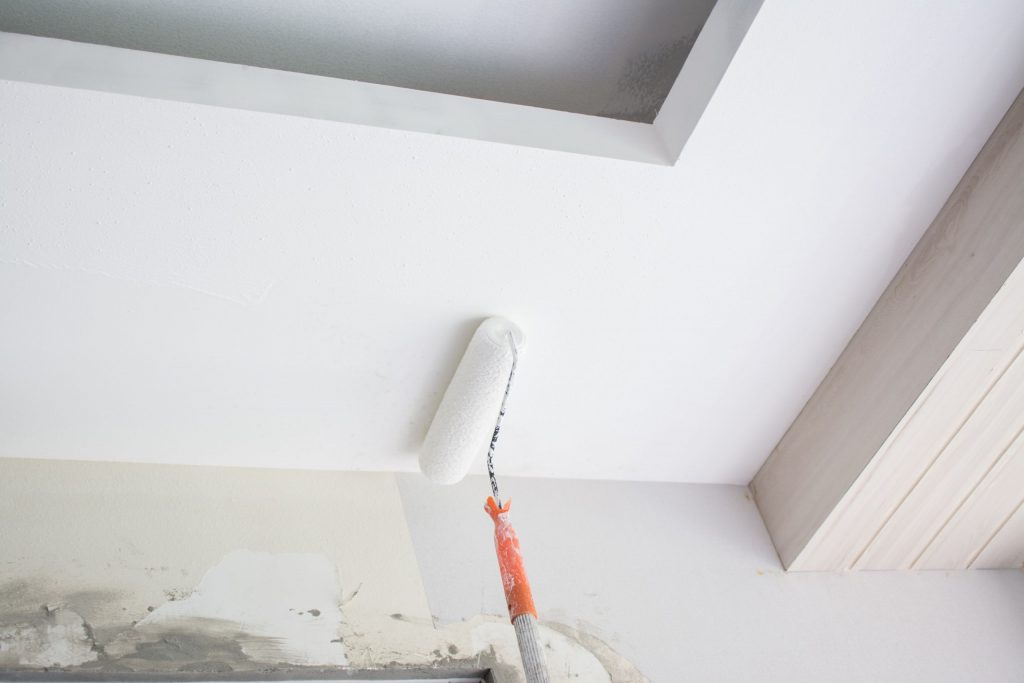
Selecting the correct roller is very essential for achieving even coverage. Textured ceilings would benefit from a roller with a ¾-inch nap length; flat surfaces would call for a ¼-inch nap. This mix keeps roller marks free and lets continuous application possible.
Apart from rollers and brushes, other essential instruments might aid to improve the painting process. Reaching high ceilings is simpler with an extension pole; an angled brush is ideal for cutting in around edges and corners. Painter’s tape guarantees perfect lines and protects surrounding surfaces from inadvertent paint splatters last. Perfect ceiling finish free from difficulty depends on the correct balance of professional-grade equipment and quality paint.
Preparing the Room and Ceiling Surface
By keeping furniture free from any paint splatters, one may assist a room and ceiling be ready for painting. Using old sheets or drop cloths helps protect floors as well, therefore preventing any paint damage to the surface beneath.
A good finish depends on cleaning the ceiling before painting. As dust and cobwebs build, an uneven surface or adhesion issues may result. A complete cleaning with a duster or vacuum attachment will provide the best canvas for painting, therefore improving the room’s whole look.
Using painter’s tape in the corners where the walls meet the ceiling will also assist to preserve neat lines and stop paint from bleeding onto undesired areas. Careful use of the tape guarantees a professional appearance upon completion of the task. To make a tight seal, firmly push down the tape’s edges on the surface.
These preparation actions really help a painting job to be successful and provide conditions for a wonderful metamorphosis.
Mastering the Edges: Cutting-In Techniques
Correct use of an angled brush is crucial to get neat, polished edges before rolling paint on walls. First, choose a high-quality angled brush that fits hand well. Paint the brush; tap off extra to prevent leaking. Starting toward the top of the wall, cut from the corner outward. One must have a steady hand; hence, it helps to direct the brush against the wall. Holding the brush slightly angled helps you to have more control for exact application around borders.
Start small, focusing on two to three feet at a time. This approach allows more attention to detail and minimizes the danger of paint drying before rolling. Those who find it difficult to maintain a steady hand may find resting their elbow against the wall useful. Recall that mastery of this approach depends on patience. Investing time to cut in correctly lays a firm basis for a perfect finish, therefore improving the whole appearance of the painted area. Any paint job will look better with clean edges, professionally changing the area.
Rolling for a Smooth Finish
Painting calls for a smooth finish, hence utilizing a roller in a “W” or “M” pattern is very necessary. This method makes paint evenly spread throughout the surface possible. Rolling the paint in this way helps one to guarantee that all areas are covered consistently, hence lowering the possibility of missing regions or uneven patches.
Working in portions is advised as it preserves a moist edge. Preventing obvious lines or streaks created by unequal drying of paint depends on a moist edge. Completing one area before going on helps the painter to easily mix the edges, therefore improving the finish’s appearance overall.
After the initial coat is put on, one should seek for equal coverage. Looking at the surface will enable one to identify areas that would need more attention. Should defects show or if the color looks conflicting, a second coat might be needed. Apart from enhancing appearance, this extra layer ensures durability and offers a professional-quality finish that accentuates any region.

Conclusion
While offering a clean, professional finish that improves the whole look of the area, a well-painted ceiling may greatly increase the light of a space. Choosing the correct hue and quality paint will help people to be transparent and warm, thereby turning any ordinary ceiling into a striking element. Before beginning this rewarding DIY road, readers are urged to gather the necessary tools, choose a suitable paint kind, and apply methodically to ensure a perfect and effective procedure. Key are time and careful work; paying great attention to details—such as uniformity and edges—will finally assist to set a clean, professional-looking ceiling apart from a rushed finish. Readers are urged to investigate further “painting techniques and tips” on the site as they examine these stages, therefore augmenting their knowledge and abilities in home renovation tasks. With the correct technique, a well-painted ceiling may take front stage in any kind of space.


